The Craftsman
This is the exterior of the lovely home we worked on to air and water seal.

Before Photo: 1
This is what the basement looked like upon our arrival.

Before Photo: 2
This is another before photo. In this photo you can see the old sump pump and some water damage on the floor. When we get to a basement waterproofing job we have to clear out any debris, pooled water, and/or unwanted creatures.

Before Photo: 3
Though it is hard to tell what we are looking at in this photo, you can see it is pretty gnarly and definitely not sealed off. Here we are looking at a crawlspace attached to the basement which we also waterproofed.

Creating Space
Now that we have cleaned out the spaces we are working in and are ready to go, we have to create spaces for our products to go. Our patent protected drainage system is subterranean, so we have to dig mini trenches around the perimeter of the infected area to make room for the tactful products. Here we are looking at the crawlspace.

SmartPipe
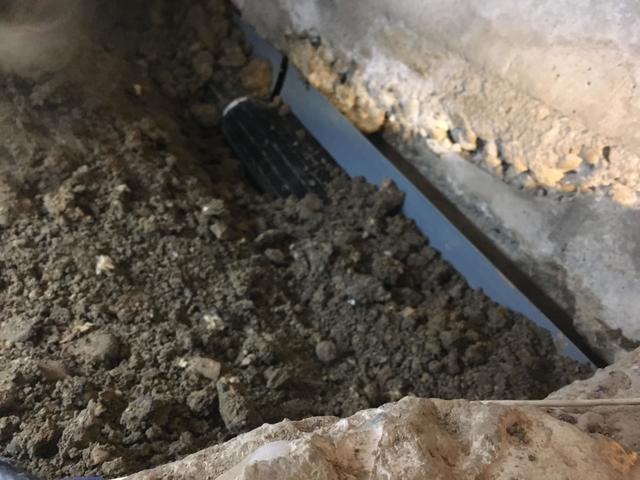
Here we are looking at the SmartPipe partially covered. This drainage system is sitting in those moats we just saw. In the crawlspace we used SmartPipe which is what you see here, and in later photos you will see the WaterGuard used for essentially the same purpose in the basement.

SmartPipe: Uncovered
Another shot of SmartPipe.

WaterGuard
The gray tracking system in the basement floor works just like the SmartPipe in the crawlspace! This will be back filled with cement and you would never know that it is a part of the floor.

More WaterGuard
This is simply another shot of WaterGuard!

A TrenchDrain
The final component to the sub-flooring drainage system aside from the sump pump is the TrenchDrain. This product will be installed directly in front of places that are prone to flooding like the door. You can see this in the next photo.

TrenchDrain: Doorstep
Here you can see how the TrenchDrain is sitting directly in front of the door!

WellDuct Window Well Drainage
Here we are looking at a way to manage any water that might be coming through the windows.

CleanSpace Liners and WellDucts
As you can see, we will end up covering the WellDuct with the Clean Space Liner! The CleanSpace Liner is what seals the walls and collects any water that could be permeating through the walls.

CleanSpace Liner
The CleanSpace Liner is like a big plastic sheet that is applied to all of the walls that have been known to let unwanted moisture seep through. They push all of the water down to the drainage system in the floor.

Filling All the Holes
Here you can see not only some more CleanSpace Liner, but also how we went back and filled in all the holes with cement.

The Old Sump Pump
The last part of the drainage system is the sump pump. This photo is of the old one which we removed and installed a new one! Click to the right to see what the new one looks like and what it does.

The SuperSump Pump
Here is the new sump pump! A sump pump collects all of the water from the waterproofing system and pushes out and away from the home.

Super Fancy SuperSump Pumps
This new fancy sump pump will alert you if it is too full so that you can catch a problem before it becomes one!

After Photos
And voila! We have a waterproofed basement!

After Photo 2
This is the exact same place as the first before photo! But now, it is air and water tight!

Out & Away
Goodbye moisture!! Now that we have installed a system to get rid of water, we push it out and away from the house. This house is water, mold, mildew, and bug free!!
